Sunday, December 28, 2008

4-way Flowers in Bargello: A Preview!

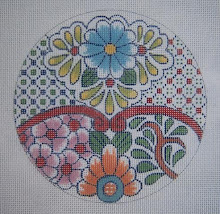
I have just put a short tutorial on Possibilities, etc. on the subject of the 4-way bargello on an egg, using the flowers I'm developing - great fun on a cold day while watching the History channel! I'll have the piece finished, hopefully, in a few days, and can post the charts and instructions here - but meanwhile, take a look at the other blog and maybe try it on your own. This is a detail of the center with the beginning of the 4-way "frame."
The blue flower has no leaves yet, as I'm tired, and need to study it tomorrow. - but here is the chart for the little pink one to keep you busy.

Saturday, December 20, 2008

Bargello Progress

I couldn't resist working on this for a few hours again today. It really comes to life with the outer framework finished - and you can see the beauty of using threads with different surface textures to further enhance the look. It would work to simply use floss or perle cotton - but is sooo much more interesting with a bit of shine and sparkle.

Outside the primary framework of the mitered bargello, it is simply a matter of filling in the blank spaces. I continued to use the format of "over 4 threads" that I had used on the other white elements, and just filled in as I could against the outline.

Backing up a little bit, this second picture (close-up) shows how very very easy it is to turn the corner at the 45 degree diagonal if you mark it first with dots out from the center.

I had to make a trip "out" today to get a big bag of cotton floss in Spring colors to start making the next ornaments and eggs, and now am starting to visualize different flowers in 4-way bargello. Quite a challenge with buttercups, etc.!! Something to look forward to, as this is my favorite part of the design process.

P.S. Update! I just posted a picture of the finished ornament on the other blog!

Friday, December 19, 2008

A Four-Way Bargello Ornament (or Egg)

I didn't get this finished, but thought it's far enough along to see what it will look like - and also easier to use as a guide for stitching. Also, I chose to use the bright colors of the season, which could easily be replaced with the colors of spring for an egg - or any color you wish on a small circle. I drew the pattern so it would fit either this 4" octagonal shape, a 4" circle, or the egg, which is 3 5/8" wide by 4 5/8" high. (on 18 mesh canvas).

As usual, I enjoyed using fibers with different textures instead of lots of different colors. The whites are YLI ribbon floss for it's shine, Kreinik metallic ribbon 1/16" in color #032 (white) and plain old DMC Perle cotton #3. The flower is made with Frosty Rays, and its center is four smyrna crosses in yellow Ribbon Floss. The leaves are Kreinik 1/16" ribbon in green. The light green just inside the darker green Perle Cotton border is also Ribbon Floss. (I love this stuff, as it's so versatile) The gold outline is Kreinik gold 002HL ribbon 1/16", and the red is the same width metallic ribbon.
The drawing on canvas is easy to follow. As always, I outlined the shape first to confine the bargello stitches and make the edges smooth and even. It's much easier to stitch this way. Also, I made the chart to fit the octagon, so you would need to expand the stitches to fill in the circle shape, as well as the egg, which is very easy to do.

Another alternative would be to simply fill in with basketweave around the basic four-way bargello motif. I have marked the centers on both designs, but you will need to mark the diagonals yourself on the circle (trusty Sharpie or Pilot ultra fine point drawing pen)

I have marked the flower center for you on the egg, as well as the diagonals. Again, I have drawn the chart with the top of the motif cut off, as it was made to fit the octagonal, but you would go ahead and expand it to use on the egg.


This motif has many possibilities both as shapes and colors, and the way of setting it up. I can see maybe Petite Very Velvet in basketweave as a background around it, and maybe a few beads set in. (of course). Enjoy being creative and adding you own touches and ideas! The stitch count is very simple - just based on two, three, and four threads high for the stitches - nothing complicated or elaborate for this one!! Just have fun and relax!


Thursday, December 18, 2008

To Brighten another Gloomy Day

This is just a small preview of what I'm working on today - probably as a mental protest against the fog and gloom we have here in Austin for yet another day. Damp and cold! Anyway, hopefully by tonight I'll have at least a small ornament made for you to print out, if not an egg, as these go fast!

This is how the 4-way Bargello begins when I get an idea. A sketch on my tracing of the egg shape, and then the drawing on canvas, complete with marked centers and diagonals - and the most fun part, THE THREADS!! Stay tuned.

Monday, December 15, 2008

4-Way Bargello: A Preview and Tutorial!

This is just a preview and some background for a project I have planned for later - maybe next week. The 4-way Bargello has fascinated me since I first saw Dorothy Kaestner's book in about 1974. The possibilities and versatility of this method are almost limitless, and can even be used to create round pieces - as ornaments, lids for round jewel cases (my illustrations, made by Inge Wooley of Creative Needle), or even glittering Kissing Balls.

Bargello is a type of needlework made on canvas with upright stitches - the name originates from some chairs seen in the Bargello Palace in Florence, Italy. (These have the "flame stitch" pattern, which is a sharp, zig-zag pattern as opposed to the curved motifs). The term "Florentine" work is also applied to this type of needlepoint, as the Bargello Palace is in Florence. I strongly suggest, as it is very interesting, that you "Google" four-way Bargello, and click on the link for the Wikipedia, which is the source for these swatches demonstrating the difference between flame stitch and the curved motifs. Lots to learn there!

Anyway, It's close to Christmas/Hanukkah, and I thought maybe a very small project to play with might be relaxing while taking a break from lots of activity. The 4-way bargello is actually a "mirror image" thing, and looks a bit Kaleidoscopic, as it mirrors in 8 sections. I'm showing the very small 3 1/4" circle (on 18 mesh) for starters to play and practice. It would be a bit larger on 13 mesh. Notice that it is drawn with an EVEN number of stitches at the top, bottom, and sides, as the stitches are made in the grooves between the threads, being upright. The center is marked BETWEEN the threads, and then the diagonals are marked with dots in all four directions.

The first stitch should be made in the center - not necessarily at the center of the ornament, but somewhere between the top and the center if you wish. Then it's a matter of repeating to the left of the vertical center the same stitches - and turning at the diagonals for the mitering. You can play with threads and colors, and create your own patterns by doing this - surprising results!!


The larger round ornament is one I made from my favorite 4 1/2" circle - and was already on an even count, as I had added the top element, and intended to make that with upright stitches in Kreinik metallic ribbon. (This shape is from my collection of Traditional Ornaments, available on my web page) If you are new to this blog, there is an earlier tutorial on drawing circles of any size, and also the instructions for the "medley of white" ornament, on which you can see that the circle was outlined BEFORE stitching the bargello. This confines the area and makes the outline neat.

I intend to offer individual 4-way Bargello ornaments here later, but meanwhile, study these beauties of Inge's and see how they are done. The last two pictures illustrate what happens by just turning the thing 45 degrees for a different look!!


Thursday, December 11, 2008

More Flower Trim!

Once started with the doodling on canvas, I couldn't leave this alone. This is my standard 4 1/2" circle - great for simple ornaments! The centers are marked horizontally and vertically, and the center of the large flower is placed - then the rest are drawn. This assures symmetry of the trims.
There are twelve threads between the center lace and the top and bottom laces.

So many possibilities for threads, etc.!! The squiggly lines simply show the direction change for slanted stitches - I like to use Frosty Rays or Rachellette for this. Bump stitches for the centers, etc. and also for the leaves in between. Use your imagination and have fun!!

My intent is to use the Petite Very Velvet as a background, as it is gorgeous with the Sundance #250 hexagonal beads for glitter. The little dots show placement of beads on the WEFT (dips) of the canvas so they will nestle down nicely and not wobble.
The photo in color demonstrates how gorgeous the PVV is in white for a background for the laces and trims (these are diagonal). You can easily see the glitter of the clear hexagonal beads. The Kreinik metallic braid in 002V (#12) is also very pretty in this combination.
This ornament drawing could also probably be used for counted cross stitch, with each dot on the canvas being used for an "X" on fabric.

Mini-stockings and Ornaments: Design Your Own!

It's still December, but I'm already thinking about/working on things for spring, including eggs - as these need to be finished to show in January. The lace I've worked on for the last few years (addictive, it is) has been on my mind for adorning eggs - with pretty white lace on pastel backgrounds in "Easter" colors. Also, pretty "lace" flower trims.

The models I have finished are, of course, for Christmas - but the lace trims are the same. You can see how very simple it is to create your own ornaments for any season by just combining different trims, techniques, and stitches.

The "Jerie" stocking has the floral lace trim dividing the body from the cuff, and diagonal ric-rac and lace on the heel and toe. The body is simply "Double" stitch.

The two smaller mini-stockings demonstrate the use of simple vertical "chains" with beaded jewels. Again, a very simple technique with pretty threads is very effective - and so much less expensive to do than the painted canvas. (including mine - as I would charge quite a bit for the time it takes to stitch paint these things onto canvas.)

The only kind of "counted canvas" I can tolerate is the kind I count directly onto canvas with my Sharpie or Pilot drawing pen - so I won't have to think while I stitch. It's an easy process that anyone can do - and mistakes can be dotted out with white acrylic paint.
This drawing on canvas is a mini-stocking on 18 mesh canvas, and it's about 3" across the top of the cuff x 5 1/4" high. It would be proportionately larger, of course, on 13 mesh. I stitch count where it indicates, but have found that it works to simply draw the rest of it (trace it onto the canvas very carefully). The reason for this is that the lace trim needs to be centered and symmetric. You can see the marked center top - there are 27 stitches on each side of the center thread. I have marked the "cuff/body" division also, and have placed one flower for you to show the centering process.
The canvas drawing of the actual flower trim shows two different sizes. The larger flower may have the flowers drawn together with one tiny leaf to separate (#1) or with a leaf between the flowers (#2). This was used on the "Jerie" stocking.
Another thing you might try is to simply do a round ornament with the flower trims. I enjoy using the Kreinik metallics for outline, and maybe Caron Rachelette or Rainbow Gallery Petite Frosty Rays for the petals. A variety of stitches could be used - "bump" stitches, or simply slanted ones that are nice and puffy, as well as sparkly.
You already have my circle tutorial in an earlier post - try it on different diameters. Also would work very well on eggs!! I have two different sets of ornament shapes for sale on my web page as downloadable e--patterns for creating these things - as I enjoy experimenting, myself, with stitches and materials. Many many possibilities for creativity here!!I
Incidentally, I have found the best way to print these out is to click on the picture to enlarge, then click "File/print preview" - and then print!