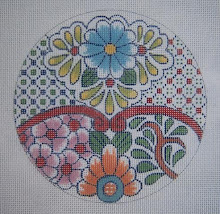
Showing posts with label Ornaments; counted X-stitch. Show all posts

Thursday, February 3, 2011

More Free Small Motifs for Valentines

Emma Broidery, on her DMC blog, has some really fine small things for downloading and print out. These, of course, will do equally well for counted X-stitch or for needlepoint. On 18 mesh needlepoint canvas, the largest will only be a little over 1" wide - Some great ideas are already popping into my head, such as repeating one or two of them to make ribbons or borders.

You can go to the side bar on the right side of this blog called "Good Stuff," and click on the "Emma Broidery Blog" button to see all of them.

I'm thinking about asking Emma's permission to stitch a few and show some variations, etc. It's great to get the creative juices flowing!!

Tuesday, February 1, 2011

Free "Small Patterns" from Liz Morrow!!

Liz Morrow (Lizart) is celebrating the first year anniversary of her web page, where she has delightful patterns to sell, by offering a new free pattern called "Small Things."

These are delightful tiny patterns that could be inserted into bigger ones, or they might be used as a central motif for building something a bit larger around them. Remember that charts work as well for both needlepoint and counted cross stitch.

You can download this and print it out - just click on the "free design" button to see it. The web page is HERE.

Tuesday, February 9, 2010

A Delightful Valentine Freebie from Liz

For anyone who hasn't found Liz Morrow's beautiful blog, she has now added a web page with downloadable patterns - and a freebie, which changes regularly.

I wanted to share this delightful Valentine with you, and also couldn't resist the purchase, myself, of one of her gorgeous bargello patterns.Her bargello is so imaginative! These patterns may be delivered to your e-mail by PDF - or you can get them "hard copy" as she calls it.

The little picture I'm showing says "click to download" - but this was on Liz's site when I touched it with my mouse - so you have to go to her web page to do that.

Also, don't forget that these charts work equally well for needlepoint or counted X-Stitch. Each little square represents a stitch, which would be an X for cross stitch, and a tent stitch for needlepoint - a simple "translation."

Saturday, May 30, 2009

X-Stitch to Needlepoint and Back


I saw counted cross stitch for the first time in the late 70's in San Antonio, where the Yarn Barn had a class to teach it (I was there visiting Bobbi). They were using a needlepoint chart from Maggie Lane's NEEDLEPOINT BY DESIGN, and it was really really pretty!. We all thought it was a lovely idea, as there would be no background to stitch. Also, working the M.L. designs were difficult for most people to try in needlepoint right off the charts - as basketweave is confusing that way.( I always went ahead and drew the patterns onto canvas before stitching, so I could relax.)

Anyway, lately, there seem to be some people confused about "converting" the charts one way or the other - but it's actually the same thing once you understand the presentation of the design.

The first picture is how a X-stitch chart would appear, with the squares filled in. To do this in needlepoint, simply make a stitch where each square is.

Considering using 18 mesh canvas or 18 count Aida - the size will be the same. I think what may be confusing is that the lines on graph paper to most of us needlepointers represent the threads on the open scrim that is needlepoint canvas, whereas the little colored squares represent the solid fabric for counted X-stitch. I have demonstrated this by making "stitches" in colored ink on the lines instead of filling in the squares on the exact same graph paper.

To do this in needlepoint, however, I would first DRAW it onto the canvas with my pen I use for designing - as I am entirely too lazy to try to look back and forth from chart to canvas to stitch.
Equally, to convert this needlepoint chart to X-stitch, just make the X's on your fabric where the little needlepoint stitches are indicated. That's all there is to it. There is nothing difficult or mysterious about it!!
I have thought that counted X-stitch would do well with the wonderful novelty fibers we have, and also some of the decorative stitches. The "bump" stitch, Smyrna Cross would do well - and a lace border could be worked, as well as other effects.
On the left is Smyrna Cross in needlepoint, where it goes over 2 x 2 canvas threads. On the right is the way it would work on Aida cloth - the count is still 2 x 2 stitches, but using the squares instead. In plain words, you could use a needlepoint pattern for lace to easily make the same effect in counted X-stitch!
I saw this confusion once when I was teaching by e-mail a friend who wanted to do work with Waste canvas on a quilt block. She did not know needlepoint, so was confused by my charts, as she kept trying to put X-s over the 2 x 2 threads, as one would do in X-stitch, so that the motif became HUGE. I can't illustrate this without pictures - but you get the idea.
Anyway, later this evening, I have a post to make about a tree pattern that could easily be translated to counted X-stitch and decorated accordingly!!


Tree With Tutorial (or "a tree for all seasons")

These trees are from about 12 years ago when I was practicing new stitches and trying out new threads, etc. I couldn't stand to waste the effort, so devised this tree - and had little stands made for them so they could either be hanging ornaments or placed on the mantel or a table. On 18 mesh canvas, they are only 4 1/2" high - nice size.

The one on the left is worked with beads on the background and swags of silk ribbon flowers. This, I think, could also be done on counted X-stitch fabric with great effect.

The green tree on the right is made with stitches I found in an old, out of print book from the 70's - I think it was "A New Look at Needlepoint" by Carole Chaney and Georgia Devlin Rome - I had found an ancient used copy and grabbed it. Except for the red upright Hungarian stitches, it is entirely upright stitches, as bargello, over two or three threads in a zig-zag pattern. Simple. I used various threads for interest in texture.
The red and green tree is made with a fascinating stitch, again from an old book. I have no idea what name it had - but that doesn't matter. It is kind of "woven" looking. The star I'm showing simply to illustrate it's effectiveness in other colors. Threads used were Petite Frosty Rays and Kreinik metallic (for the woven element).
By the way - do notice that these are all OUTLINED first in simple tent stitches so that the decorative stitches end cleanly and neatly with no ragged edges.The first chart shows the sequence of the vertical stitches for beginning this stitch.

The entire shape should have the verticals done first, and then turn the canvas and do the horizontals. The last chart shows the horizontals in orange - and also the metallic braid being woven through - first vertically, and then horizontally. For some reason, this was more effective. The braid stays ON TOP of the canvas- only goes to the back at the end of an entire row, and then back up again to start back across.


The tree drawing on canvas is easy to do - plenty of instructions on this blog - probably under "canvas preparation." This outline could easily be done in counted X-stitch on fabric, and decorated any way you wish. Even for other seasons!!

Incidentally, this tree is one shape from my downloadable e-pattern collection on Elegant Whimsies (my web store), as "shapes for all seasons."


Thursday, December 11, 2008

More Flower Trim!

Once started with the doodling on canvas, I couldn't leave this alone. This is my standard 4 1/2" circle - great for simple ornaments! The centers are marked horizontally and vertically, and the center of the large flower is placed - then the rest are drawn. This assures symmetry of the trims.
There are twelve threads between the center lace and the top and bottom laces.

So many possibilities for threads, etc.!! The squiggly lines simply show the direction change for slanted stitches - I like to use Frosty Rays or Rachellette for this. Bump stitches for the centers, etc. and also for the leaves in between. Use your imagination and have fun!!

My intent is to use the Petite Very Velvet as a background, as it is gorgeous with the Sundance #250 hexagonal beads for glitter. The little dots show placement of beads on the WEFT (dips) of the canvas so they will nestle down nicely and not wobble.
The photo in color demonstrates how gorgeous the PVV is in white for a background for the laces and trims (these are diagonal). You can easily see the glitter of the clear hexagonal beads. The Kreinik metallic braid in 002V (#12) is also very pretty in this combination.
This ornament drawing could also probably be used for counted cross stitch, with each dot on the canvas being used for an "X" on fabric.

Sunday, September 28, 2008

A Great Idea!

It has just been called to my attention by a friend who doesn't needlepoint, that these ornaments would also work as counted X-stitch. In this case, just regard each thread intersection on the grid (as needlepoint canvas is an open-weave scrim) as one little square on cross stitch fabric. I think that would work, as the "bump" stitches certainly would, and the background can be left bare - think of all the pretty color combos that could be done! I know there are very pretty overdyed stranded cottons and silks to work with. Caron has them, as the "Watercolours" is too thick for work on fabric. You would, of course, eliminate the step of drawing on fabric with an ink pen.